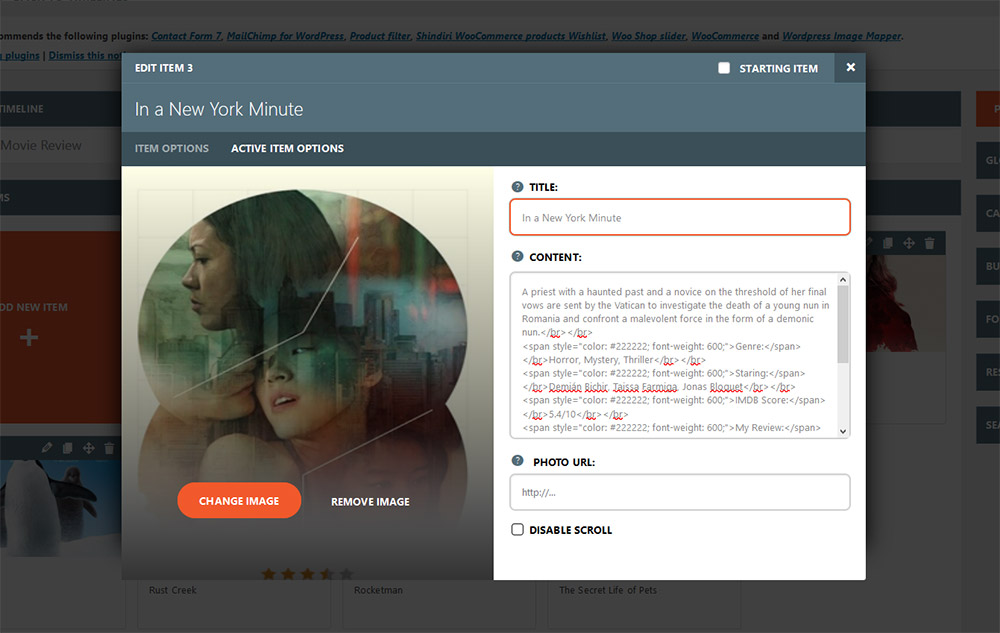
One of the most unique features of Content Timeline is the card that slides out when you click “Read More” button. However, you can also add a link directly to a blog post or any custom URL for each card.
Once you create a new Content Timeline the default option for a “Read More” button opens a second card to the right of the one that you clicked. This card is called “Active Card” and it displays the content from an “Active Card” backend tab.
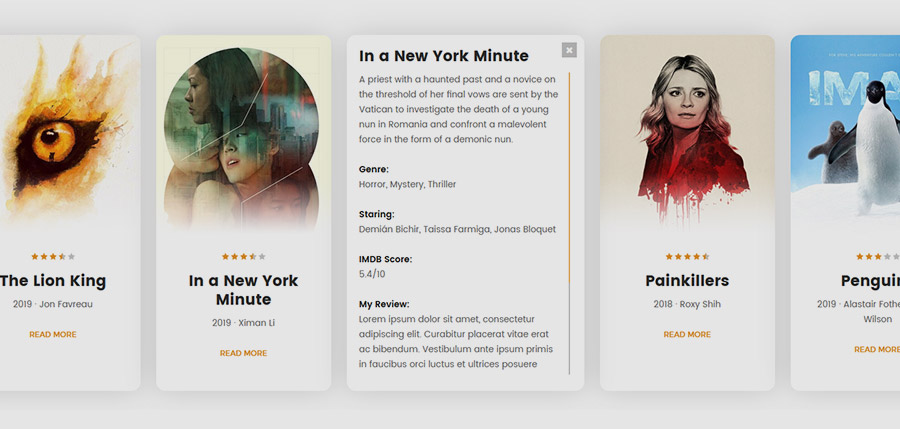
In the case that you are loading posts from a single blog post or an entire WordPress blog category, the “Active Card” displays the entire content of each blog post. You can edit the content of each card from the Timeline WordPress backend. If you are creating a custom card, you have to manually input the content for the “Active Card”
The “Read More Link” option in Content Timeline allows you to control where you want your website users to go. You can select one of the 3 options: Open in a card, Open link, Open link in a new tab
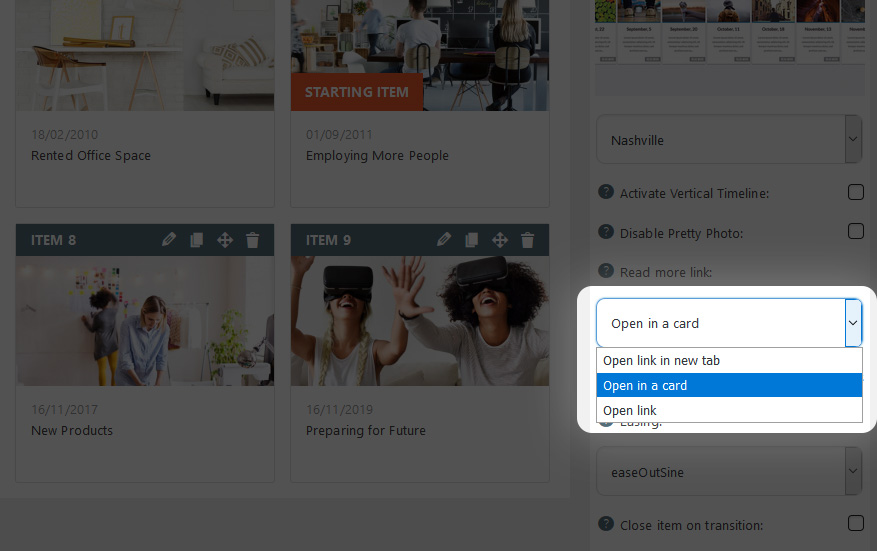
· Open in a card: Your content is displayed in an active card on the timeline.
· Open link: Opens a page depending if it is a blog post or a custom URL
· Open link in a new tab: Your content is displayed in a new tab

